You’ve realized the value of customized presentation folders, determined that you need them, and are finally ready to pull the trigger to have them professionally printed.
But now you’re facing a dilemma — a creative dilemma: How to design your folders. You’re not alone. Most of us are not born artistically inclined, and even those who are can find it perplexing to come up with an appropriate and effective design composition.
Of course, there are two expedient ways to deal with this: 1. Just slap your logo smack in the center of your folder’s cover; 2. Hire a professional designer.
At first thought, these two approaches would, ostensibly, solve the dilemma. But if your goal is to impress, you’ll soon come to realize that it’ll fall short — and that more will be required. Considering the amount you’ll be spending on the professional printing, you had better come up with a visually appealing final product.
THE FOUNDATION
As is the case with any worthwhile creation, the foundation is the most critical element; the element upon which everything else is built. In the case of your folder’s design, the two main foundation pillars would be your brand identity, and the purpose that the folders will serve.
Knowing these — especially if with great conviction — will also help identify your target audience, for whom you can craft your message. Without a solid foundation, it will be much more difficult to find a starting point, and any design attempts you make will likely be ineffective and appear convoluted.
Since this is about how to design the folders, we won’t get into the details of branding, and in fact, will work under the premise that you have already determined your target market, and established your brand identification, including logo and company colors. The colors are particularly important because they will form the basis of your design palette.
THE FUNCTION
The primary function of your folder will dictate the overall mood and design philosophy. Whatever the function may be, it is a given that other pertinent materials will be inserted in the pockets of your folder.
Presentation folders usually serve one of the following three functions:
1. SALES TOOL
Although this could also be combined with branding or promotional functions, perhaps the main difference is that a sales tool’s main objective is to generate a quick response; if not immediately, then at a predetermined timeframe in the very near future.
Your design should have a a powerful “wow factor”, and the prospective client should get as much relevant information upon receiving your folder. Information that can include contact details such as your website URL, email address, physical address and phone number.
That being said, you should still practice restraint and not overdo it by cramming too many elements in your outer design.
2. MARKETING, PROMOTIONAL, OR BRANDING COLLATERAL
This (as well as a sales tool, with which it is often combined) is probably the most common function of a presentation folder. As such, it is used mainly for getting the word out to let recipients know about you, as opposed to immediately closing the deal.
Your folder design should show you in the best light by showcasing your best assets or attributes.
Since the goal isn’t necessarily to generate sales immediately, the design can be more subtle. For example, contact information could be placed on the back or inside pages.
3. ADMINISTRATIVE MATERIAL
In this function — which could include use for internal business meetings, filing documents, or distributing procedural instructions or guidelines — the “wow factor” is less of a concern since the users will be within the organization. Even so, a well designed folder could help inspire or boost company morale.
DESIGN PRINCIPLES
Having established the foundation and function, you now have a guide and can start with the actual visual layout of your folders. Like a map and compass, you’ll see how much you are staying on course or veering away from your core foundation as you go along the design process. Here are some design principles that you can follow as you embark on your design journey.
Visual Hierarchy
At the onset, it is best to establish your visual hierarchy. Visual hierarchy refers to a structure that defines the value of each visual element (image or words) in your design for the purpose of guiding the viewer’s eyes and drawing attention to those elements, in order of importance.
At the top of this hierarchy is the focal point of your folder’s cover design. Sometimes referred to as the “hero image” or “hero element”, this will be the most prominent visual image in your layout. You should clearly determine which one it will be. In most cases, this is your logo; however, depending on your pre-defined aim, the hero image could also be images of your facilities, a featured product, or the depiction of its use, even a tag line or company slogan.
Additionally, the following three attributes affect visual hierarchy:
1. SIZE. Larger elements are seen first, and also give the impression of being the most important. This is even made more impactful when complimented with a smaller element or elements.
2. COLOR. Brighter colors naturally draw the viewer’s initial attention. Be mindful of color contrast in your design. For example, background and text that are similar in hue, shade or darkness can have the visual effect of blending, thus making it difficult to see the image or read text. Conversely, color high-contrast between elements, achieved using opposing shades or darkness, are attention-grabbing and more legible.
Choose a color palette that resonates with your brand. If your brand’s colors are completely different from those your top competitors, it would be best to avoid using colors closely associated with them, lest your viewers be reminded of the competition rather than you.
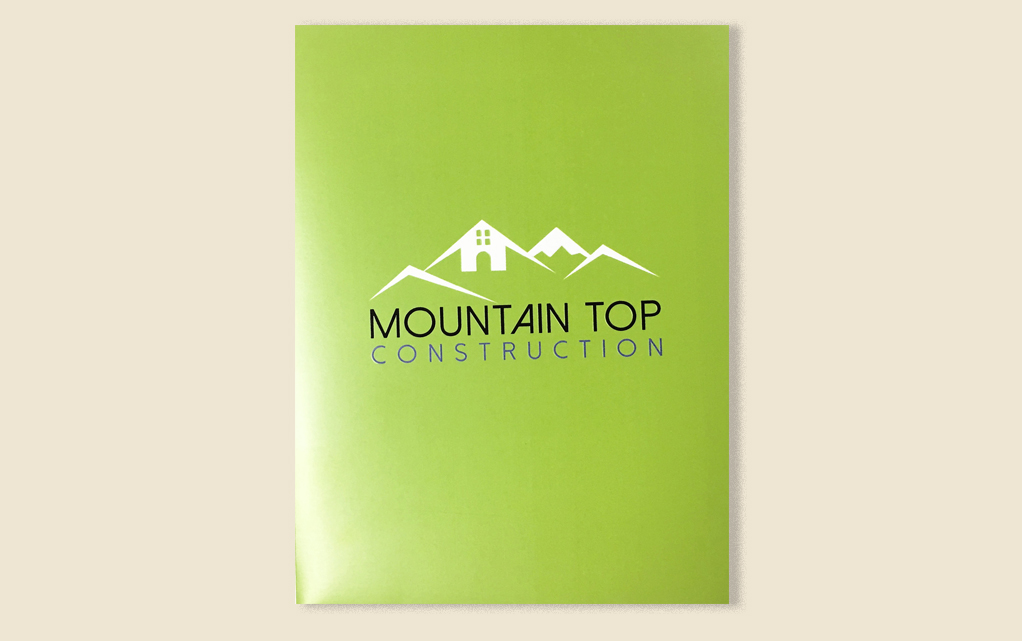
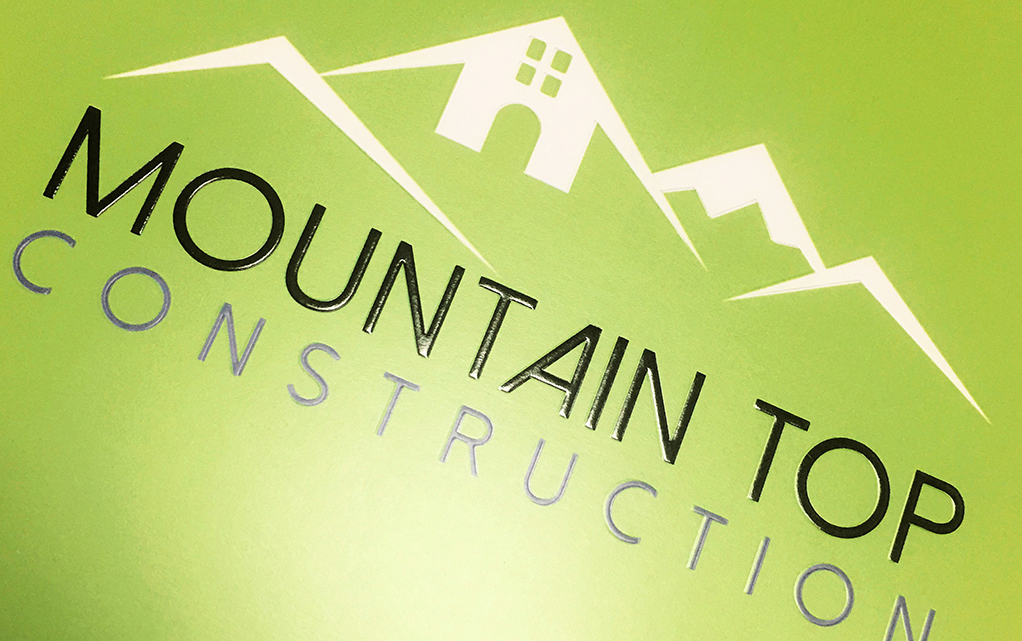
3. POSITION. How elements are positioned and placed within your folder can convey their importance. A large image right in the center of your cover would be visually unavoidable; however, you could also consider other techniques like “breaking the grid”, which gives the “why is that image there and why is it placed that way?” effect, thus making it more intriguing. This arrangement of elements leads us to the next design principle: Balance.
Example of logo and focal image smack in the center of folder's cover. This the most common, safest, and easiest positioning application. Image credit to Mountain Top Construction
Balance
As it relates to design, balance refers to the arrangement of graphic elements according to their “visual weight” so that no one area overwhelmingly overpowers another; thus resulting in a page — or spread — that is equally weighted throughout. Understanding this concept and applying it in your design composition can result in a more aesthetically pleasing folder that “feels right”, and whose look and message will be easier to take in for your viewer.
Achieving design balance requires the adoption of one of the two common layout approaches: asymmetrical or symmetrical. To get a better grasp on these concepts, first draw an axis by dividing the page equally into two parts across its center, in any direction. How images are placed on each side determines your design’s balance when the page is viewed in its entirety.
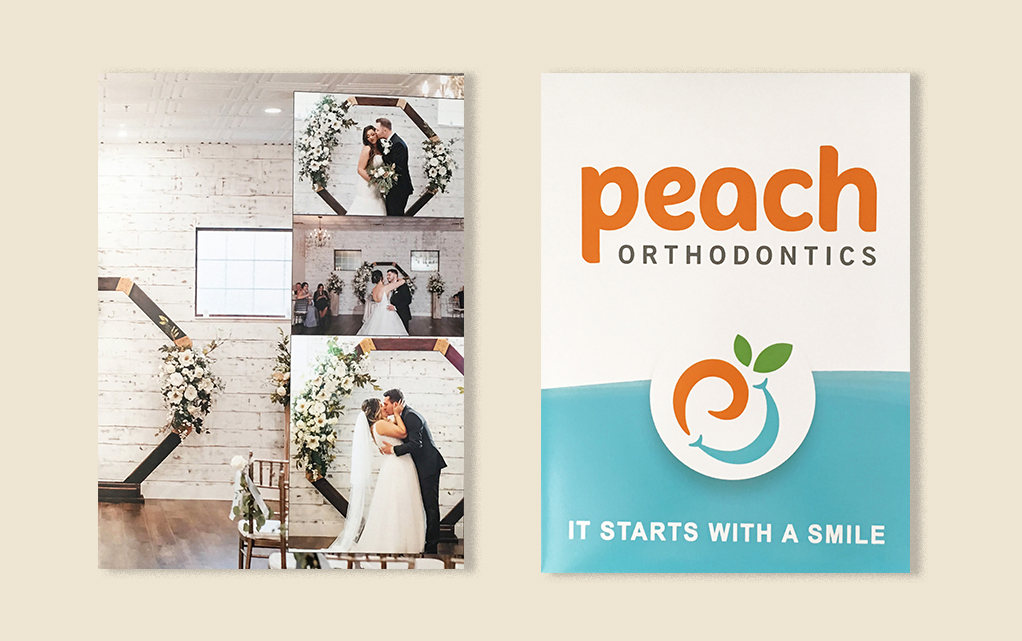
Symmetrical balance is the result of each side of the axis having imagery of the same weight as that of the other. This sameness naturally results in balance. It is the safest and simplest — most formal — approach, but is also the most predictable.
Images showing examples of design layout with symmetrical balance. On the left (credit to Agave Estates) horizontally balanced. On the right (credit to Peach Orthodontics) vertically balanced. In both cases, the image weight is equal between the opposite sides: Left and right in the case of horizontal balance; up and down in the case of vertical balance.
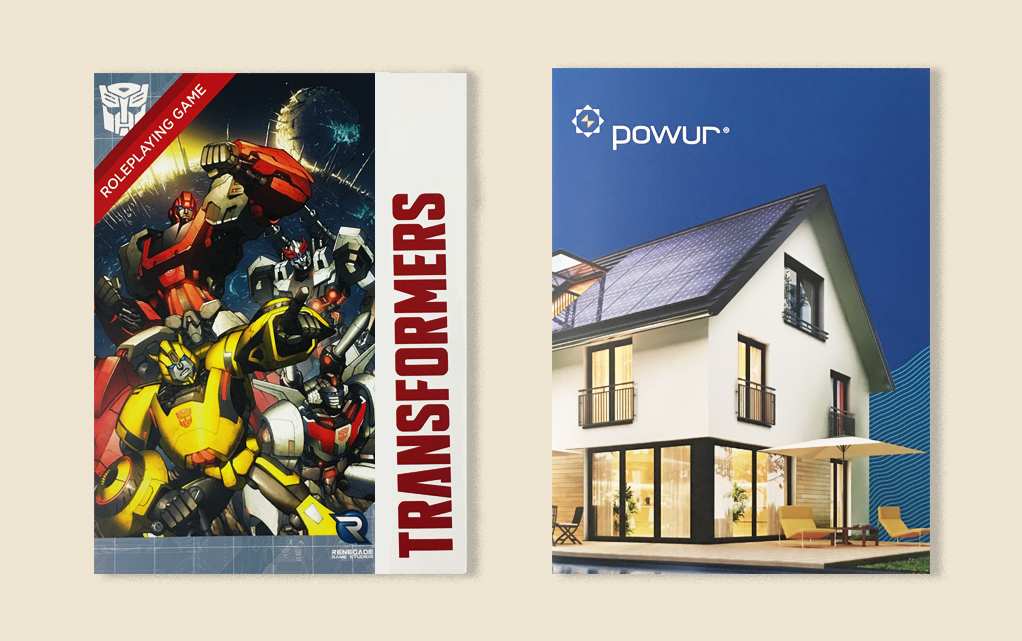
On the other hand, the asymmetrical approach is one in which imagery on each side are of differing or unequal weights, yet still looks cohesive. Because it is not as rigid as its counterpart, asymmetry creates a bit of visual tension, evoking feelings of boldness, movement, and modernism, which could be more intriguing to the viewer.
Images showing examples of design layout with asymmetrical balance. On the left (credit to Renegade Games) horizontal flow. On the right (credit to Powur Solar) vertical flow. Both examples also follow the "Rule of Thirds."
THE RULE OF THIRDS
Because of its clearly defined structure of equality, symmetrical balance should be relatively easy to execute. Composing an asymmetrically balanced design, however, might be a little tricky for total beginners. To this end, one concept that could prove to be useful is the “rule of thirds.”
The rule of thirds is not so much a hard-and-fast edict as it is a guideline. The rule proposes that a visual composition be divided into nine parts by a grid created with two equally spaced horizontal lines and two equally spaced vertical lines, very similar to a tic-tac-toe board, and that your hero image, focal points or important elements should be placed along those lines or the points where they intersect (which happens to be the four corners of the square in the middle of the grid — also referred to as power points).
Two of the basic applications are based on the focal image’s orientation or size. If based on image orientation, the rule places the hero image on either two thirds or one third of the grid (on left or right if the image is vertically oriented; upper or lower if the image is horizontally oriented ), leaving the remaining space more open.
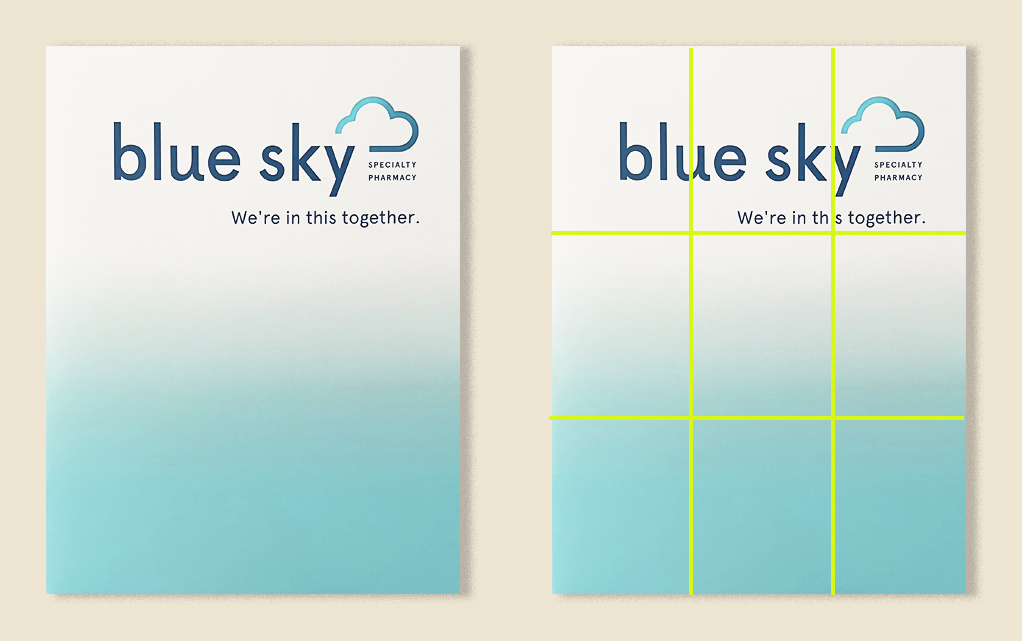
Example of "Rule of Thirds" application in vertical (up and down) orientation. Notice that the logo and tagline block (focal point image) occupies the upper 1/3 of the page, while the remnaining lower 2/3 is filled with the colored gradient. Image credit to Blue Sky Specialty Pharmacy.
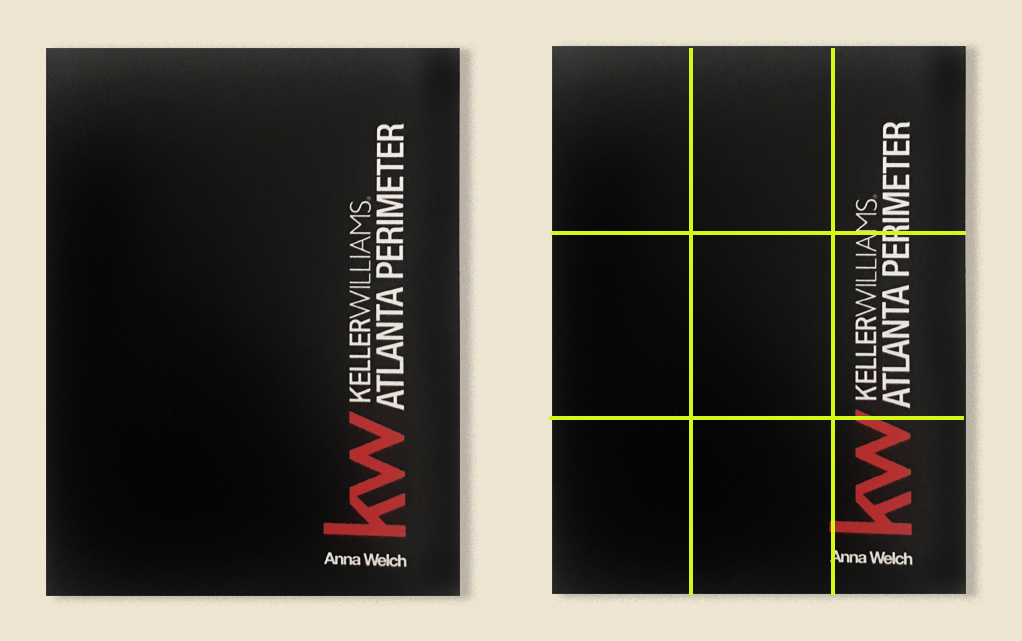
Example of "Rule of Thirds" application in horizontal (left to right) orientation. The logo block (focal point image) occupies the right 1/3 section of the page, while the remnaining 2/3 is "blank" (entire page is covered in black). Image credit to Keller Williams agent Anna Welch.
If based on size where your image occupies most of the page, focal points are to be placed on — or very close to — at least one the aforementioned power points.
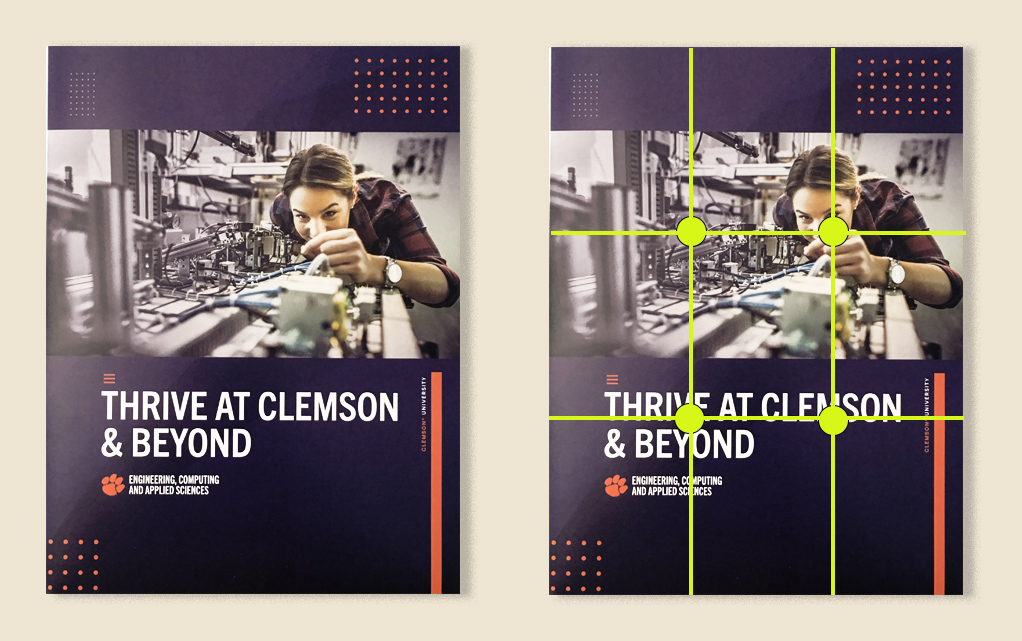
Example of "Rule of Thirds" application with a large focal point image (picture and tagline). Here we see that, 1. the person's hands and face are on the top right power point/ grid intersection, and 2. the tagline straddles the two lower power points/ grid intersections. Image credit to Clemson University.
Seamlessness and Cohesion
The overall look and flow of the folder when spread open should look seamless, as one cohesive and “continuous” design. That said, it does not mean that you have to literally spread an image across the panels (although you could). It also does not mean that it is mandatory to have graphics elements on the back cover.
The key is to avoid abrupt or drastic shift in the visual flow.
The Background
Unless your folder’s paper is of a predetermined dark color (e.g., black linen), you can print on every centimeter of its surface. The easiest route is to just place your design elements and leave the paper white (its stock color) not adding any background images. The next simplest look is to flood the entire surface with a solid color on top of which your graphic elements and text will sit.
This is where you should be mindful of color contrast, as discussed earlier under the "Visual Hierarchy" section.
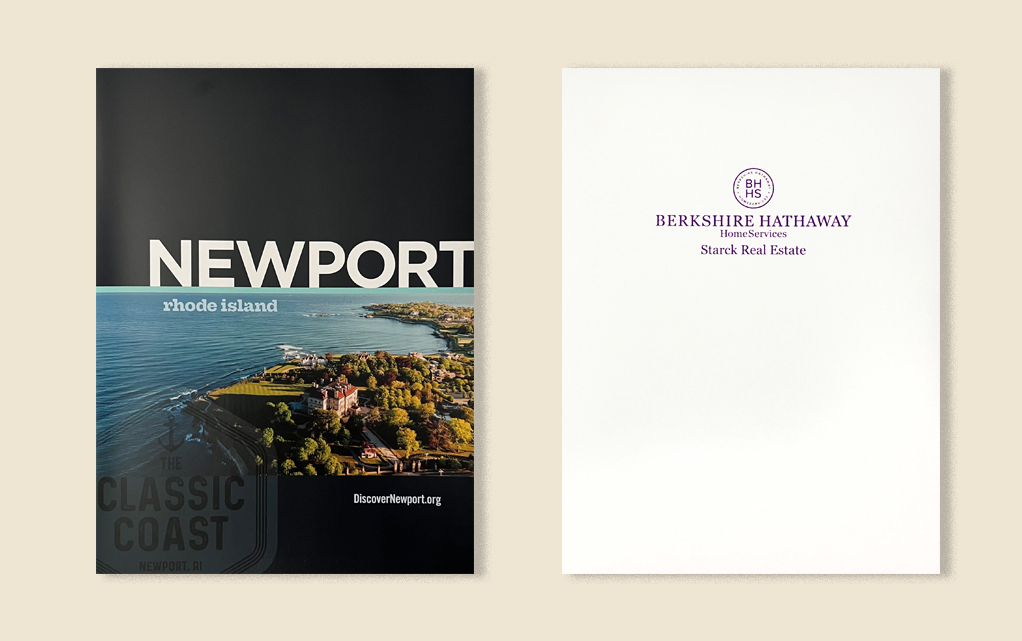
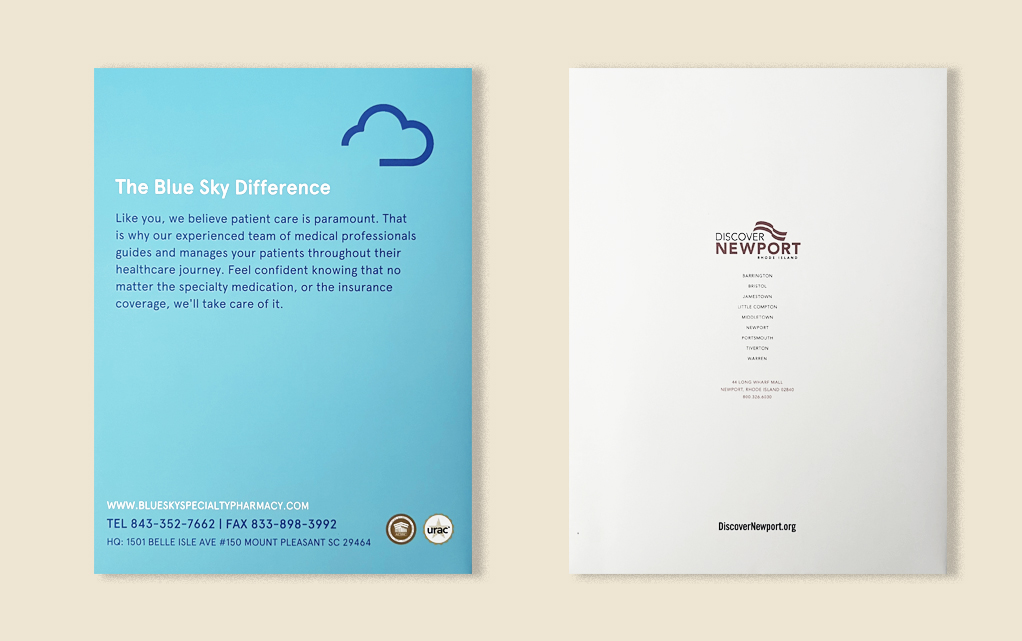
Examples of different background treatments. On the left (image credit to Discover Newport) is a folder design in which the background is covered in solid blue ink. On the right (image credit to Berkshire Hathaway HomeServices Starck Real Estate) is a folder with no printing in the background.
If you’re feeling particularly bold, you could add images to a large section — or the entirety — of the page, while always applying the concepts of balance. However in doing so, you might run into the issues of clutter, wherein there’s just too much going on visually; and legibility, in which your intended focal point is not the first image that jumps out, or is outright indistinguishable from the background.
In such predicaments, you may find these two techniques helpful: ghosting, and outlining.
Ghosting is a graphic design technique that decreases the opacity of an image to achieve a faded look. The effect is akin to how something would look behind a sheer curtain. By doing so, any image that has not been decreased in opacity will appear in stark contrast to the ghosted image.
The other technique is simply creating an outline around the focal image using a color that sharply contrasts with it and the background. For example, you could apply a white outline around gray text set against a black background.
Examples of blending background, ghosted background, outlined image
A caveat regarding background images: A lot of printers impose an “ink coverage charge” depending on the expanse of your image; however, there are a few, like folderprinters.com, that do not levy such a fee.
IMAGE USE AND RIGHTS
A word to the wise with regard to image sourcing: Always be acutely aware of potential copyright infringement issues regarding any image not created by you. Speaking of copyright, it is best to avoid using stock images. Mainly because between looking perfectly staged and being readily available for use by anyone (heaven forbid, your competition), it exudes a lack of authenticity.
THE TECHNICAL STUFF
After grasping the abstract concepts of design, you can now move onto its actual physical implementation.
GET YOUR BEARINGS
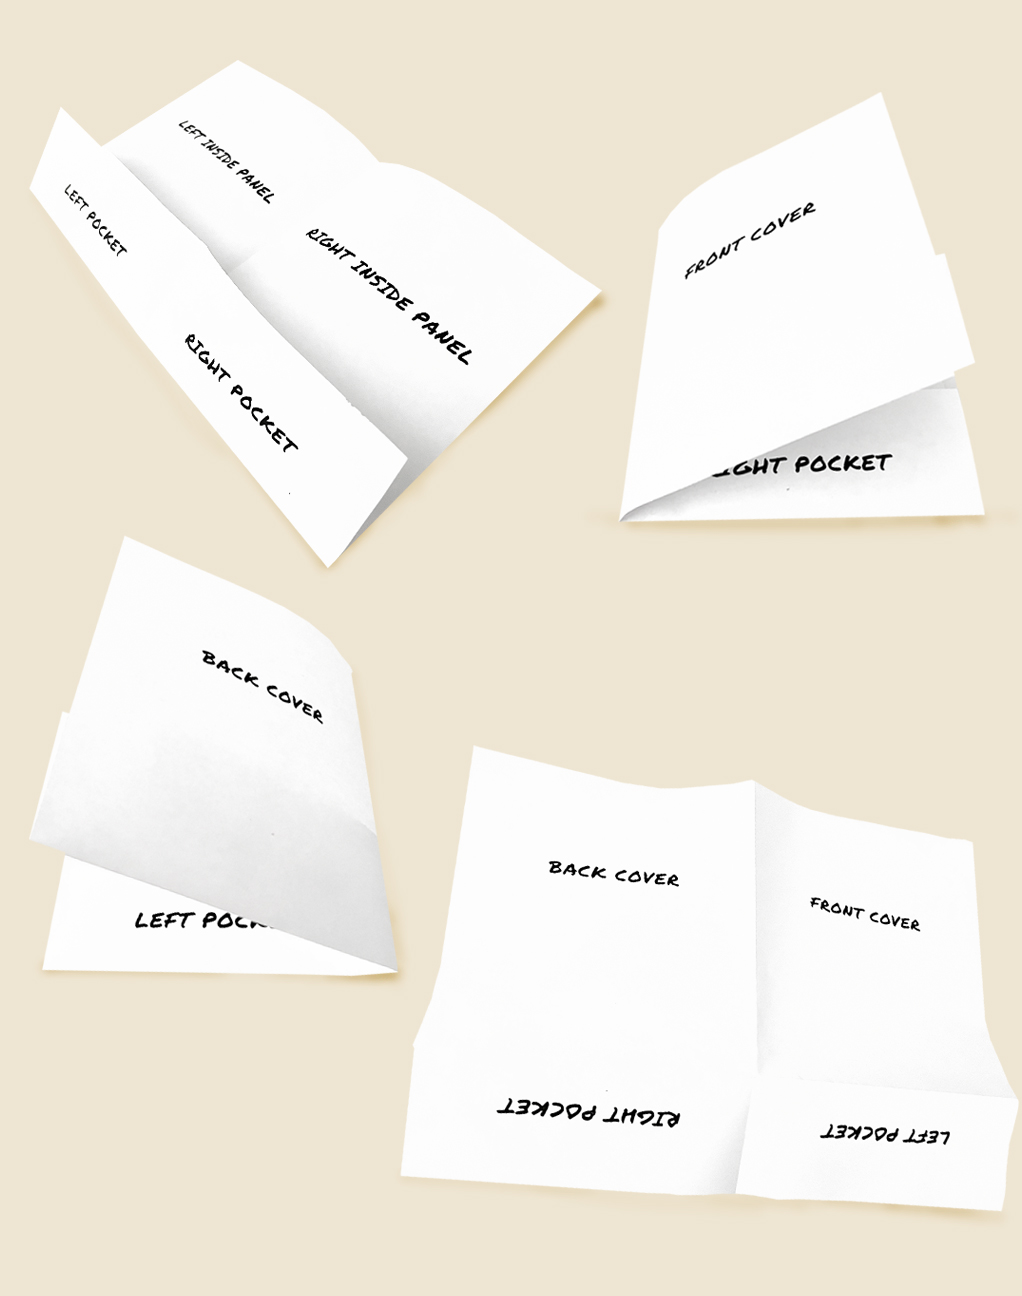
To lessen the confusion, and to know exactly where and how to place your design elements, try this little exercise: Get a pen and piece of paper. Fold a panel covering the entire width upwards, at some point one-third from the bottom of the sheet. Next, fold the sheet in half from left to right.
At the moment you are done with the last fold, what is now facing you is the folder’s front cover; label it as such. Now open your “folder” from right to left. Remember the first panel you folded upward? Those are your folder’s pockets (if you unfold the pockets, that entire side you see is the folder’s inside panel).
With the vertical fold in the middle as demarcation line, label each pocket “left” and “right” accordingly. Fold the spread again (first fold the “pockets” up again, in case you unfolded that bottom panel), this time from right to left, after which you’ll be faced with the folder’s back cover. Label that, too. That should cover all the parts of your folder.
A folded paper dummy will help in knowing the different parts of your folder for layout purposes.
DESIGN TOOLS
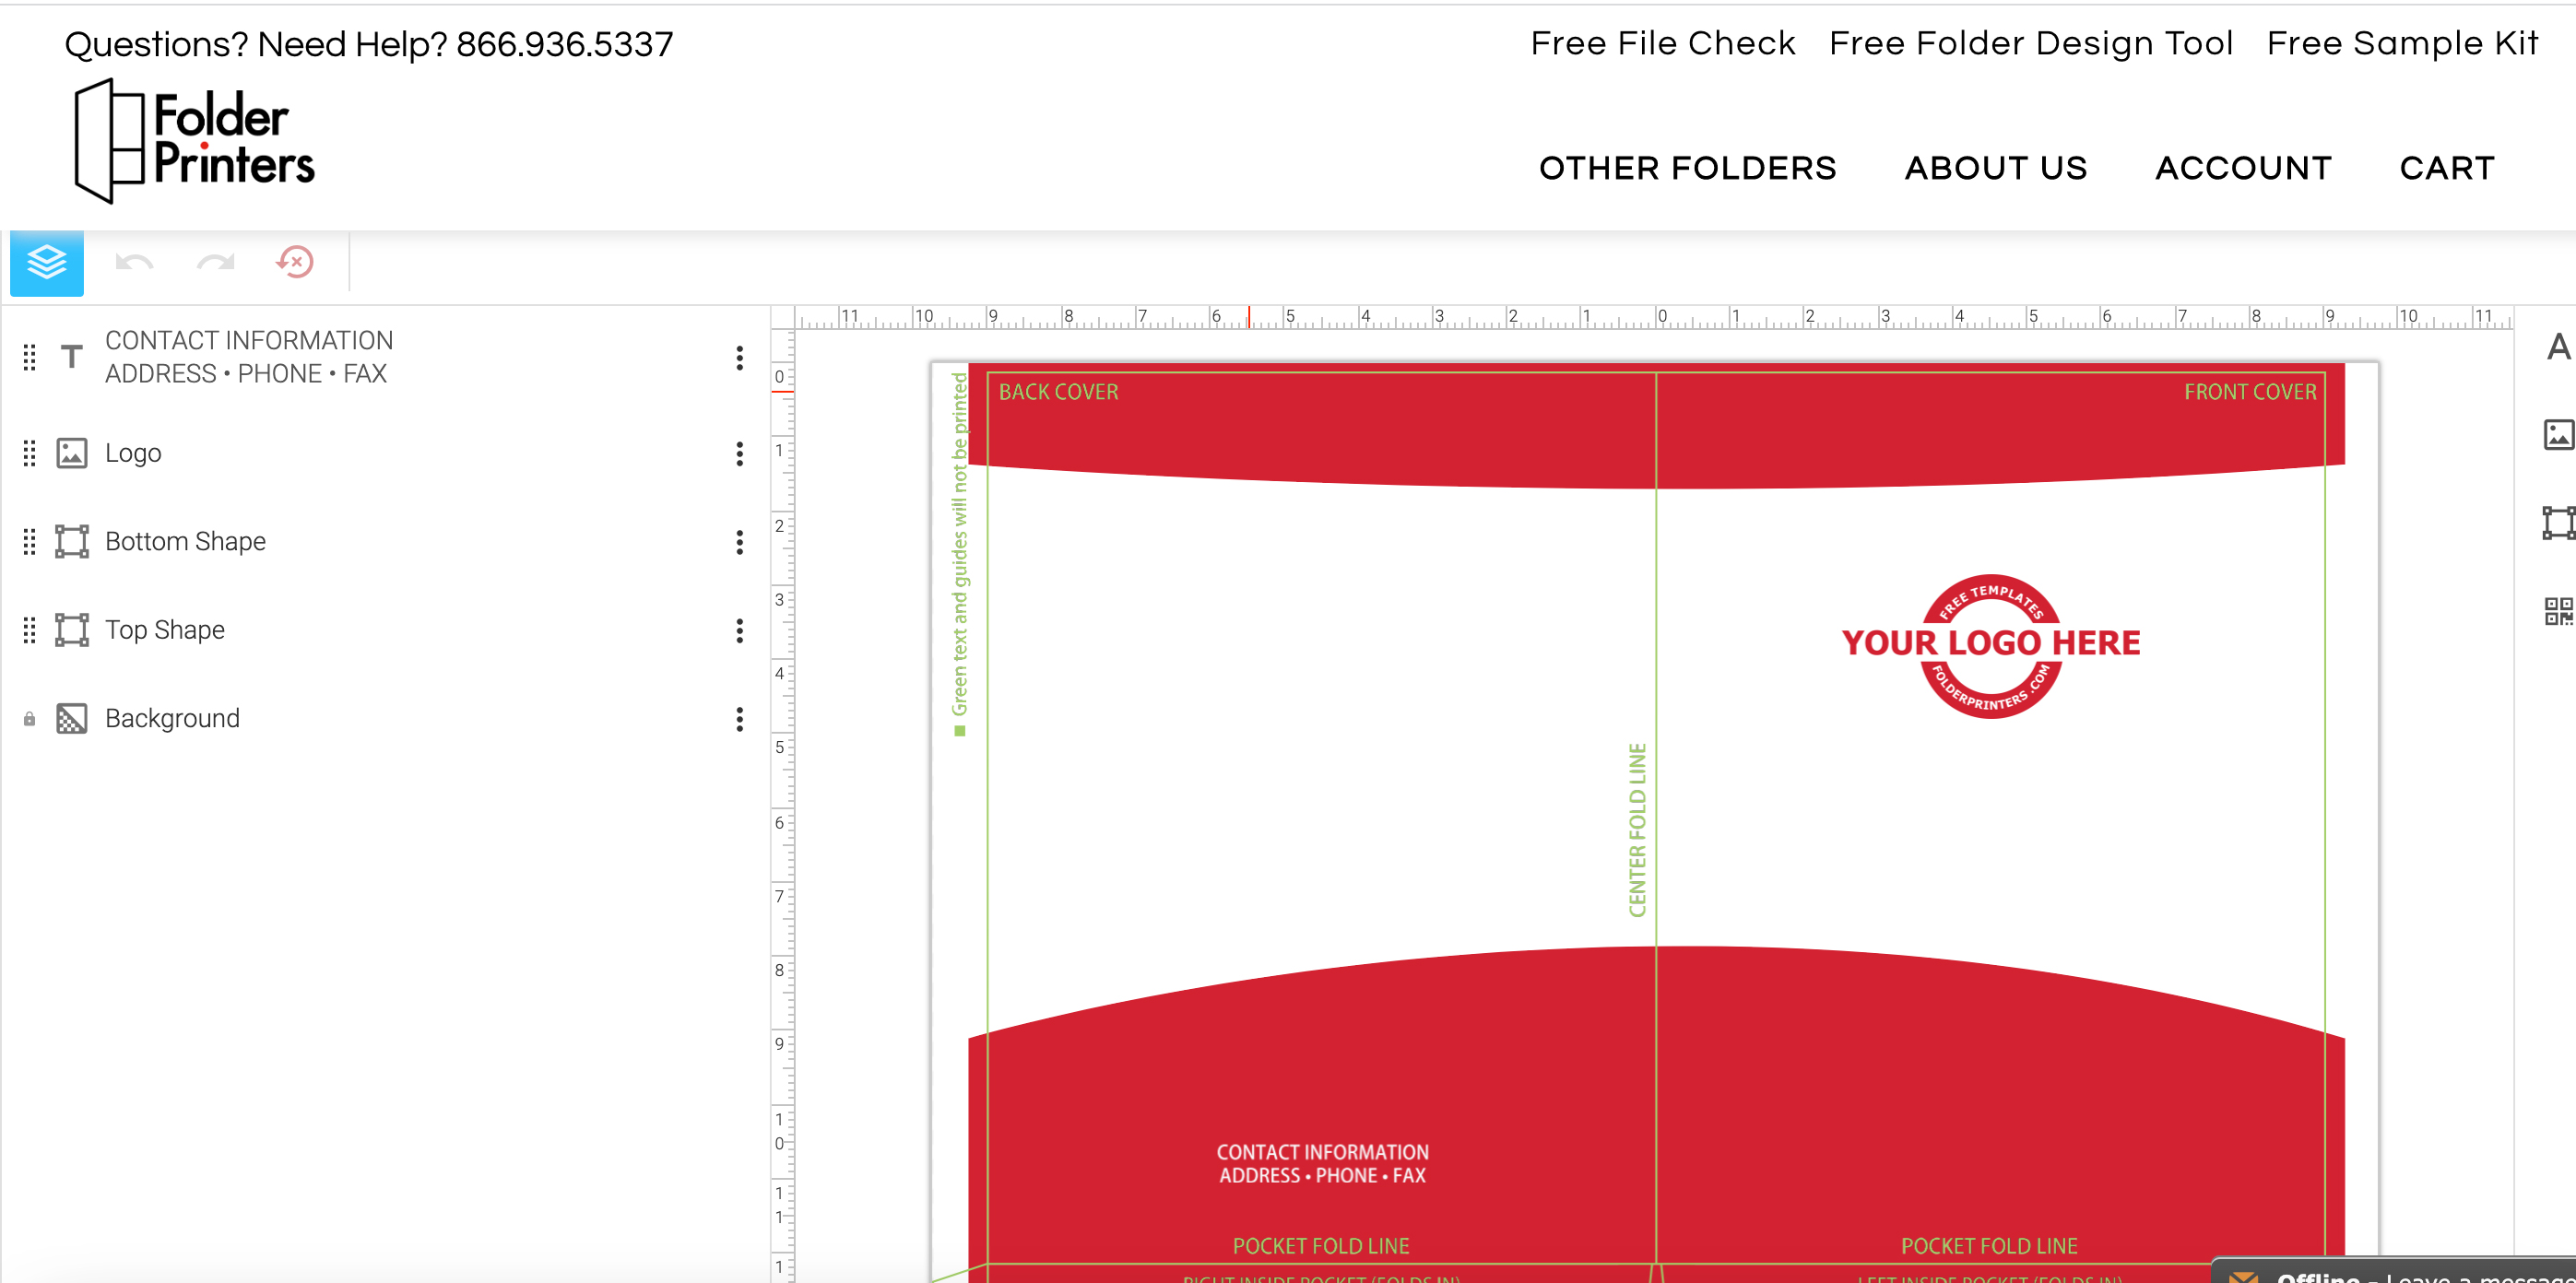
Use a properly licensed desktop publishing software such as those offered by Adobe and Corel. If you do not have access to such software, there are free-to-use online designing tools. Any reputable professional folder printer should have this feature available to their customers on their website.
A screenshot of Folderprinters.com's online design tool.
When using desktop publishing software, make sure to set the color profile to CMYK (cyan, magenta, yellow, black) and save as such, because this is the standard for professional printing.
Always keep in mind that the colors that you see on your device or computer screen will not look exactly the same as those on the actual physical printed folders.
USE A TEMPLATE
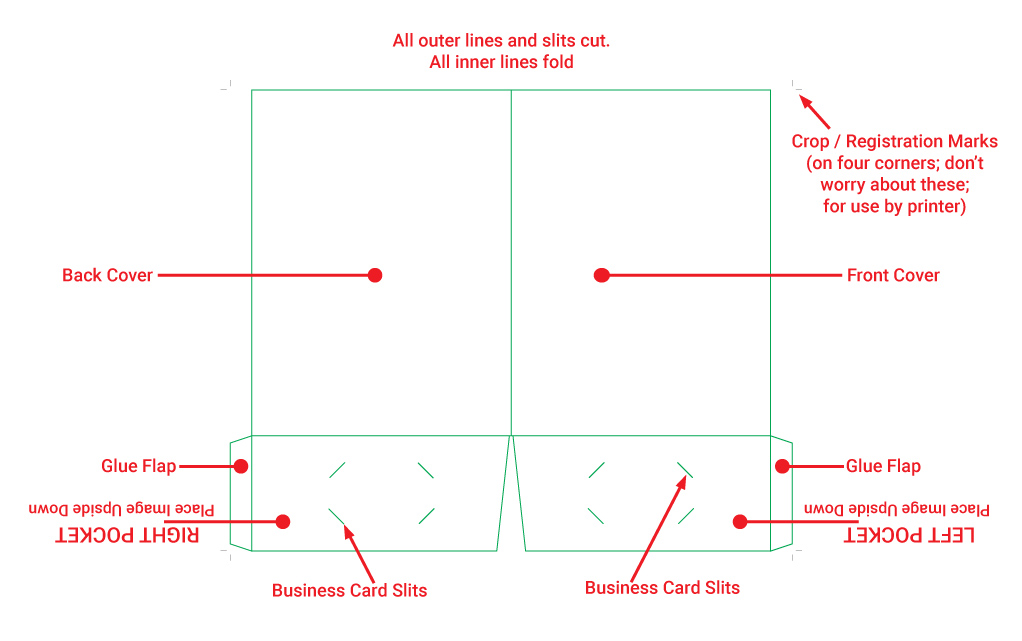
When executing the actual layout on your designing program, it is best to utilize a template, preferably one supplied by your printer. Such a template will have lines indicating borders, cut and folding points. These lines also clearly define the folder’s different sections, which will make it easier for you to know where and how to place graphic elements.
Template of Standard 9x12 Folder.
PRINT AREAS
Pockets
To get the most bang for you buck, know that as long as it is one continuous image that does not require any other printing process (e.g., foil, extra coating), the outer side of the pockets can be printed at no extra charge. This is because during production, when the raw sheet of paper passes through a printing press, both the cover and the face of the pockets share the same surface. You will get a better understanding of this if you open the prototype paper dummy as described in the “Get Your Bearings” section.
During the design process, in which the folder layout is viewed completely flat, images on the pockets should be positioned upside down. The reason being, after the pockets are folded upwards and glued, the image will then appear right side up.
One Side or Both
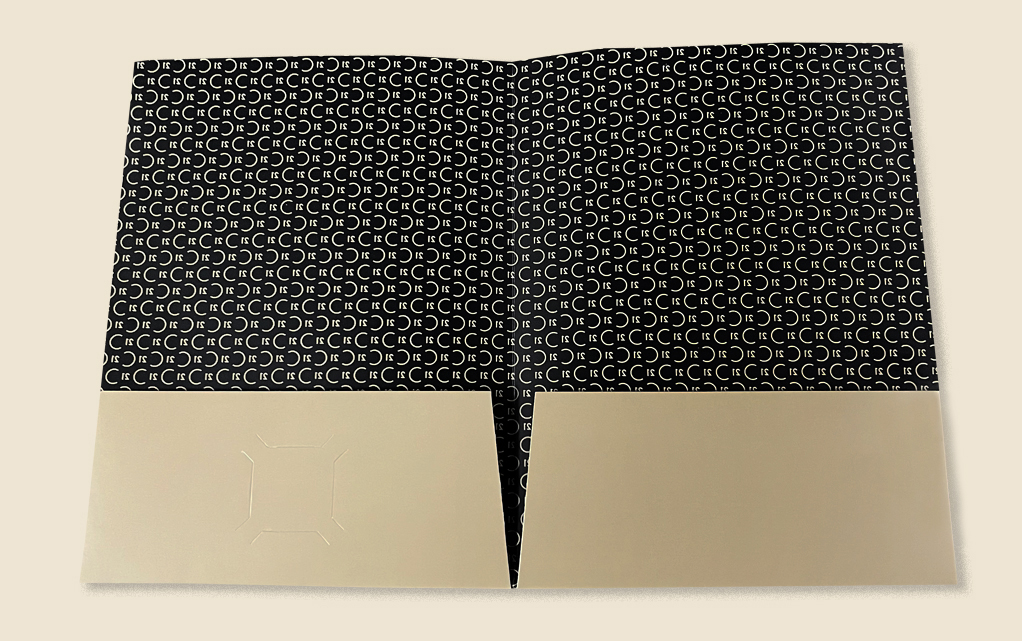
One of the factors that affect the price of custom folders is the number of sides (inside and outside) printed. It is usually unnecessary to print the inside since the materials inserted in the pockets are the focal point. But if you feel that images on the inside can help in your folder’s message and goals, and you’re willing to fork out a bit more for it, that option is available.
A folder with printed inside panels/pages. Image credit to CENTURY 21 Arizona Foothills.
Don't Forget the Back
Although it is hidden from view upon initial presentation, the back cover of your folder is still valuable real estate. As such, it would be a good idea to include images of your logo, message, or contact information. In doing so, you can be assured that important brand or contact formation can always be seen regardless of your folder’s position.
Back covers of Sky Blue Pharmacy and Discover Newport, Rhode Island.
Slits
Any decent printer should not charge extra for business card slits, so do take advantage of this and have them on your folder. Be careful not to place any text or important image along the path of the slits.
Bleeds
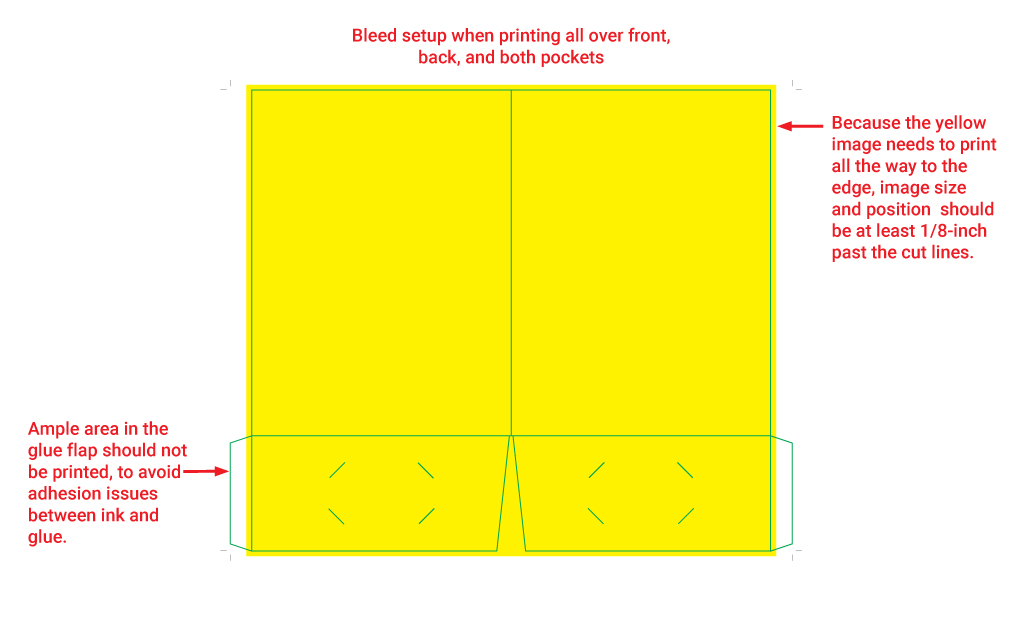
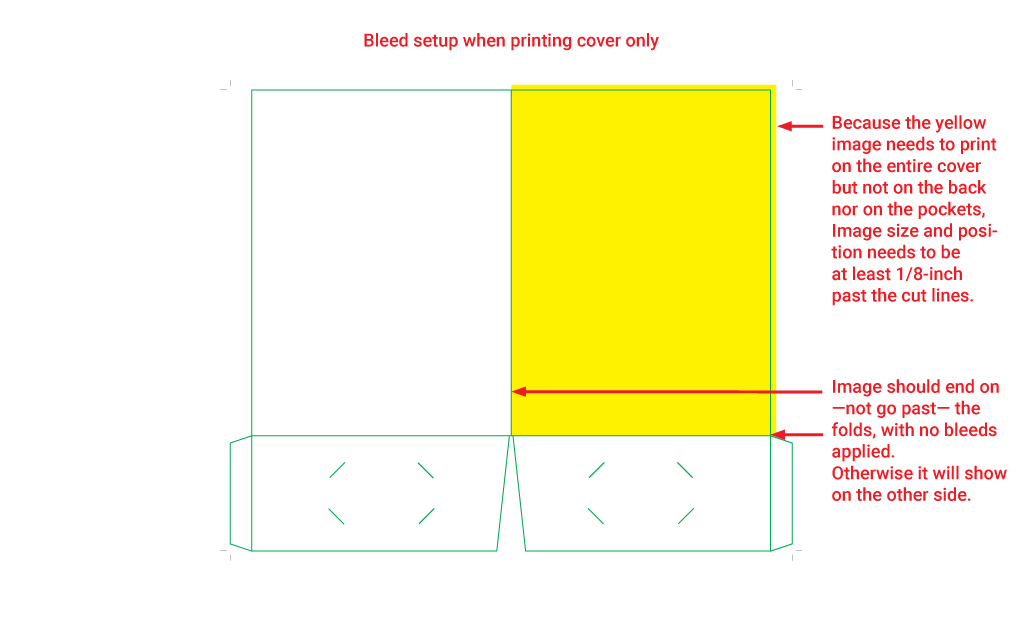
One strange term that you’ll hear in professional printing is “bleed”. Bleed factors in when your image or ink coverage is designed to appear all the way to the end — completely flush— of any of your folder’s edges. To achieve this look on a printed piece, during the process of laying out the design, the image should be positioned and sized in a way that it goes past (usually no less than 1/8th of an inch) the outer border of the page or art board. In doing so, the image “bleeds” or “spills” over to the outside of the page.
Without bleed, your folder’s edge will have a thin white line (the result of the paper’s original color showing though because is not covered with ink) after it is trimmed by an industrial printing cutter.
It is important to keep in mind that, by and large, bleeds usually apply to areas where the paper is cut, not where it folds. If you create a bleed along the spine, the excess image will appear on the other side of the fold, which, unless it is your intention, would look odd. The same can be said of the bottom edge where the inward and upward fold creates the pocket.
One section that folds and where bleeds should be applied is the glue flap. This is necessary because the flap will not be visible after it folds inward and the pocket is attached to it. Essentially, it will have the visual effect of being “cut”, as part of the outer edge of your folder. But there is a caveat: the bleed image on the flap must be no more than the minimum required (1/8” of an inch), leaving the remaining area unprinted. This is because the flaps are where glue is applied, and contact with ink will produce negative chemical effect that diminishes the glue’s adhesiveness.
PAPER AND FINISH OPTIONS
PAPER TYPES
While the process of designing is chiefly concerned with optics, the tactile effect — especially where first impressions are concerned — on the recipient of your folder shouldn’t be minimized.
In this regard, you would do well to consider proper paper selection, and post-press finishing applications.
The feel of a flimsy folder might give the impression of unreliability; conversely, a thicker folder stock could convey a level seriousness and respectability.
The two most common paper thickness used for custom folders are 12 point and 14 point. Twelve point paper will meet the bare minimum of acceptable rigidity, while 14 point is generally found to be ideal, possessing just the the right heft and sturdiness.
Anything thinner is feeble, and anything thicker might just be overkill.
Then there’s the matter of paper surface types: uncoated or coated. Uncoated paper carries with it a more formal tone. There are many types of uncoated paper, to be sure, but for the purposes of producing folders, the type that is most used is linen paper.
Linen is generally pricier than coated paper, and is usually printed with specialty processes such as foil stamping and embossing, especially in cases where the selected paper color is dark.
Coated paper comes with either matte or gloss coating. Gloss has more sheen and matte has somewhat of a velvet feel to it. Which type to use it purely subjective depending on your taste or brand identity.
If you’re looking for ways to make your folders stand out even more, you could look into employing specialty coatings or additional printing methods.
SPECIALTY COATING OPTIONS
Two specialty post-press coatings that cover opposite sides of the sheen spectrum are soft-touch and high gloss UV (for ultra violent).
Soft-touch coating produces a more pronounced velvety look and texture; the appearance is similar to that of a lightly frosted class, and the feel on the tip of your fingers is indeed soft and luxurious. The application of high gloss UV coating gives your folder surface a glass-like look. You could say that one is underrated while the other, flashy.
Because specialty coatings are an add-on feature for which there will be additional fees, it helps to remember that the standard aqueous coatings of either matte or gloss are included in the regular prices of most professional folder printers, and therefore available at no extra charge. Although aqueous coating is less pronounced than the specialty coatings, they are noticeable enough and, more importantly does not increase your purchase price.
CONFIGURATIONS
The most common presentation folder configuration is portrait-oriented, two-panel with a single fold between them, and having one or two flat pockets, that is 9 inches wide by 12 inches tall when the folder is folded shut. You’ll notice that those measurements are perfect for containing most document sheets, being slightly larger than the standard copy paper and letterhead size of 8.5 x11 inches.
However, in cases where more space is required due to the number of items to be inserted, or images and text to display, one of the following configurations can be can utilized. Although keep in mind that because these are not standard, they carry a higher price tag and therefore less economical compared to a regular folder.
THREE-PANEL GATEFOLD FOLDER
Consisting of three panels of uniform width, with folds located between each of the panels. There may be pockets on all three panels or just on those specified.
CAPACITY FOLDER
As the term implies, this type of folder offers extra capacity for holding more documents and material, compared to a standard folder. Also called a gusseted folder, the extra capacity is made possible by creating more space inside the pockets. Whereas a standard pocket lays completely flat against the folder panels, a capacity folder’s pockets utilize gussets to create space and a gap between it and a folder’s panel.
This is especially useful when the documents or material to be contained in the folder are quite thick and would appear bulging and unkempt in a standard flat pocket.
STITCHED INSERTS FOLDER
A cross between a pocket folder and a multiple-page brochure. Such a hybrid item is produced by affixing (usually by means of staples) at least one folded piece of paper along the spine (main fold) of a pocket folder. It is, essentially, a book with pockets.
This type of folder is particularly useful when there is an overabundance of uniform-information to be conveyed — that you might as well print altogether, en masse — yet have room (in this case, pockets) in which to place dynamic content materials.
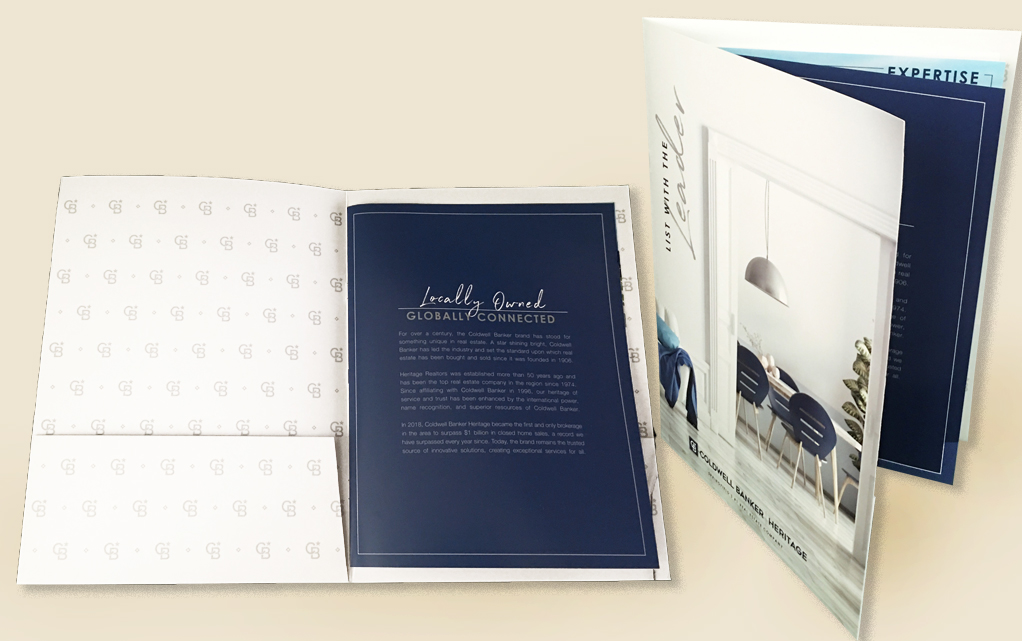
A folder with stitched inside pages. Image credit to Coldwell Banker Heritage, Dayton.
OTHER PRINTING AND EMBELLISHMENT OPTIONS
Ink is by far the preferred imprint medium; however, there are other printing methods that do not require it at all.
These methods, which can either stand alone or be added as an accent or embellishment, include foil stamping (application of metallic foil in the shape of a designed image, on the surface of paper), embossing or debossing (raised or recessed relief images on the paper).
Detail of SBA Dermatology's folder featuring gold foil stamping on white linen paper.
Detail of Mountain Top Contruction's folder featuring both embossing and foil stamping (black foil).
CONCLUSION
You could always go with the easy option to just place a large logo smack in the middle of the folder’s cover.
But if you want to come up with a more impressive layout that could help present your brand in a better light, or more effectively deliver your message, after reading this piece, you now have basic knowledge essential to composing such a design. Even if you do hire a graphic designer, you would know what to look out for and demand in the proposals presented to you.
After all, perhaps worse than being called boring, is being labeled uninspired or ineffective.