Folderprinters > Blog > Professional Grade: How a Presentation Pocket Folder Gets Its Shape
How a Presentation Pocket Folder Gets Its Shape
Learn about the different methods and techonologies the pros use.
BY FOLDERPRINTERS WRITERS
January 09, 2023
Most printed products, especially those used for marketing and branding, like flyers, business cards and brochures go through a simple and fairly straightforward production process: print, cut, or fold, or bind — done.
Presentation folders, however, are just a bit more complex, requiring several specialized post-printing procedures.
One of those procedures is cutting to an intricate shape in order to fashion sections that will become pockets.
If you’ve ever wondered how pocket folders get their shape, read on.
There are three main methods by which professional printers cut a printed piece of card stock into the shape of a pocket folder. But before getting into these methods, let us first see the desired shape.
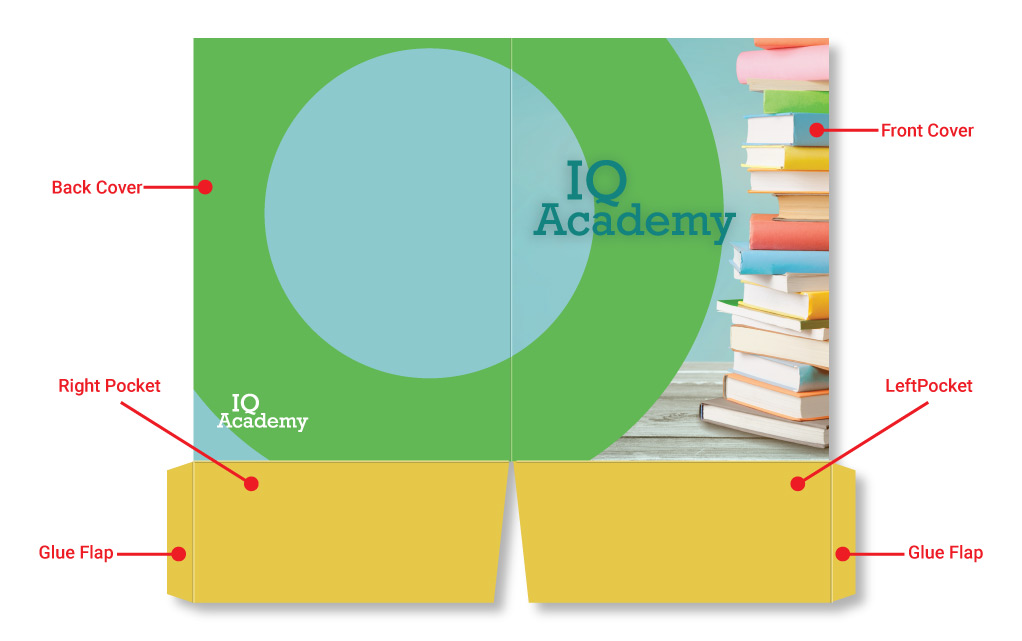
The image below shows what a standard 9x12 presentation folder with left and right pockets looks like after it is cut, yet still unassembled.
The shape is set during the design phase through the creation of a die-line. This die-line is the pattern that the cutting blade will follow. As you’ll see later, two of the three methods utilize a die in which a large unibody blade is in the exact shape of the aforementioned die-line.
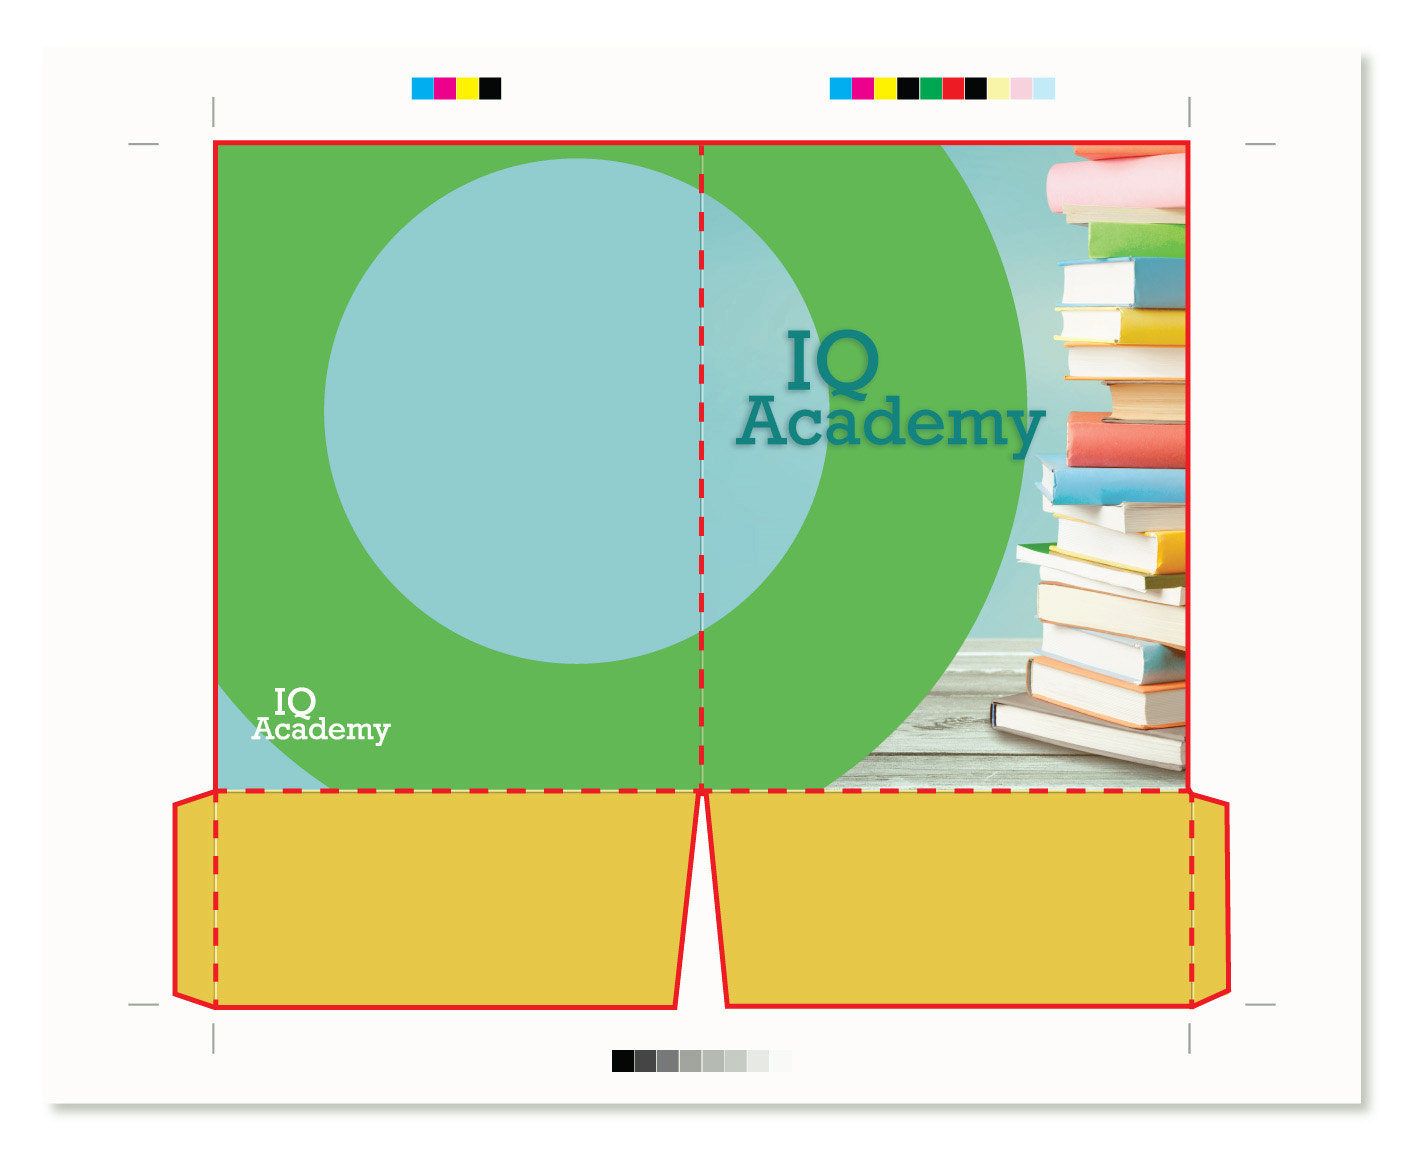
Die-line (in red) overlain on a folder image printed on a large sheet of card stock paper, still uncut and unassembled. Solid lines indicate cut out from paper; dashed lines indicate scoring for folds.
The die-line is for illustrative purposes only, it does not actually print in real-world production.
FLATBED CUTTER
The first method and machine is called a flatbed cutter. While all the methods employ technologies of varying complexities, this one — putting aside the software aspect — could be considered the easiest.
Particularly because it does not require a die. Instead, a single, conventional blade affixed to a robotic arm slices around and across the paper that lays completely flat on the machine's wide surface (bed; thus the name).
The die-line details are fed into the machine’s computer, which then gives the robotic arm the route to follow.
Flatbed cutter with printed sheet laying on surface ready to be cut. Inset shows closeup of single blade.
This method is the slowest, taking at least a minute or two to complete because the slicing motion has to trace and go through the full route of the paper’s outer edges and inner folds; therefore not the most efficient, and good only for one-offs or single-digit quantities.
DIE-CUTTER PRESS
The next method is the most traditional: Die cutter press. It is also the oldest in that it employs technology that is decades — if not a century — old. Although there are newer more modern machines employing this technology, the basic principles have stayed the same.
Indeed, many 50 plus-year-old machines are still in use today. The folder’s shape is achieved in one chopping motion by sandwiching the paper between a large and heavy metal cylinder and a die.
The die is a unibody blade molded into the shape of the die-line, set in a block of wood. A mechanized feeder sends paper to be chopped, one sheet at a time.
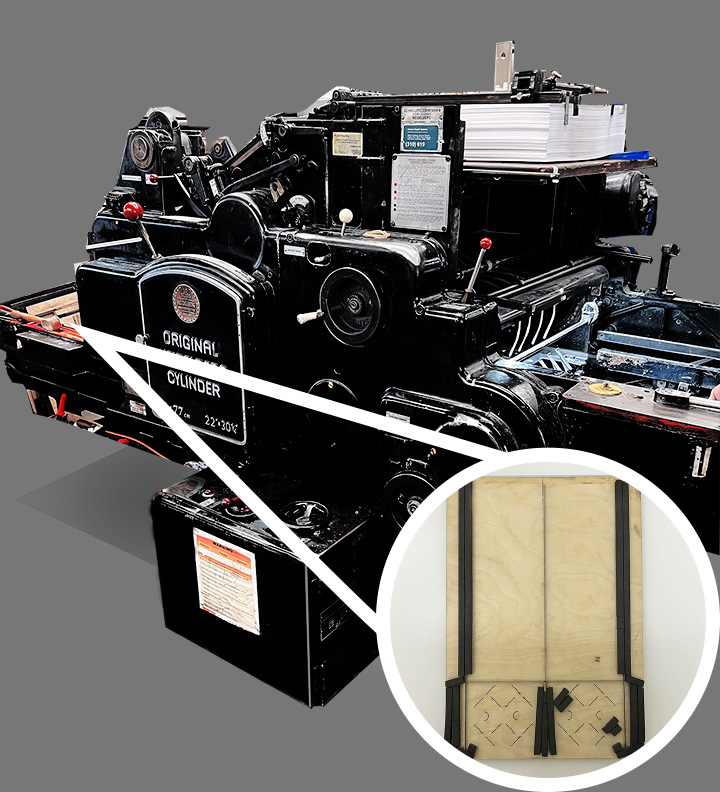
Traditional cylinder die-cutter press. This particular model is is 50 years old yet still in excellent condition. Notice the white stack of papers at the top, ready to be fed into the machine for cutting.
Inset shows die composed of a unibody blade in the shape of a folder, set in a block of wood; indicating where it goes within the machine.
Because the cut is just one quick chop, taking mere seconds, it is therefore much more speedy and efficient compared to the flatbed cutter, making it more economical and perfectly suited for large (i.e. hundreds or thousands) quantities.
This method is also utilized in cases where the folder has a more complex configuration (e.g., three panels), or when it requires extra processes such as letterpress or foil stamping, and thus cannot be glued and folded immediately.
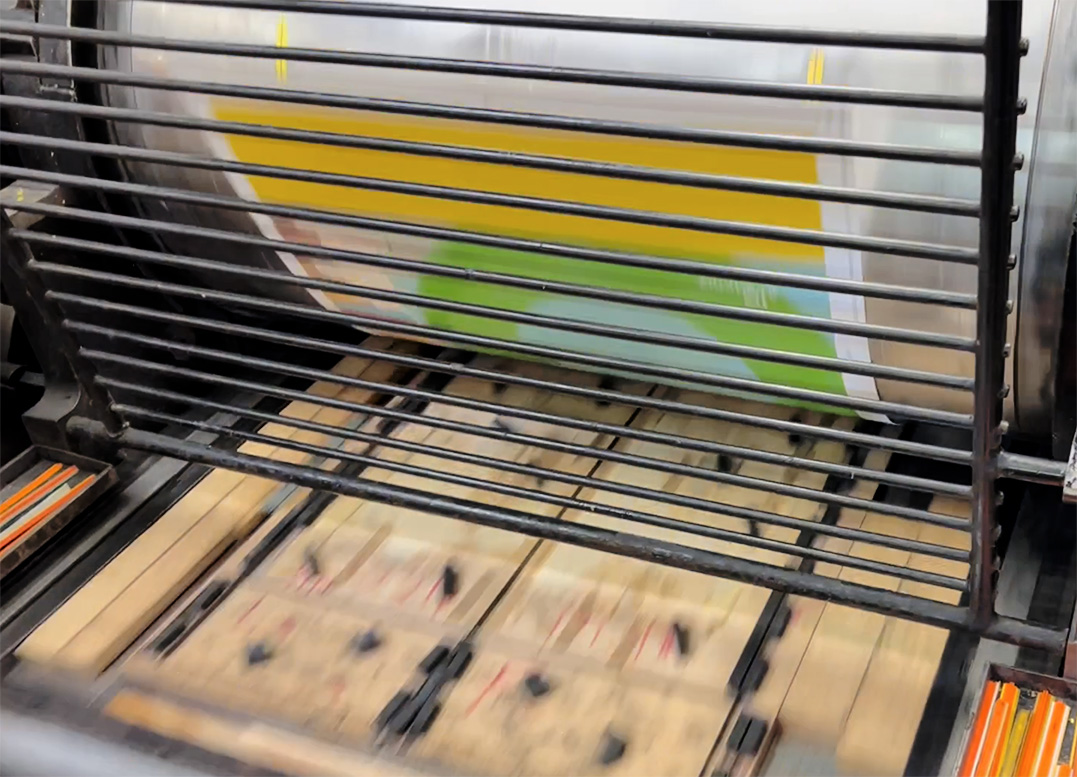
A printed sheet hugging a die-cutter’s large cylinder, on it’s way to meeting the blade.
ROTARY CUTTER, FOLDER and GLUER
In the first two methods, after the papers are cut into shape, they need to be glued and folded in order to form the pockets. This requires an extra step, which is done either manually or the utilization of automated machinery.
The last method is a rotary cutter, gluer and assembly machine. Among all three methods, it is by far the most efficient because all the steps — cutting, gluing, and folding — are done in one pass through the machine, traveling on a conveyor system to several stations before ending up as a fully formed presentation pocket folder.
First, the printed sheet of paper is cut as it is sandwiched through a rotary cutter. The rotary cutter is a large stationary but spinning metal cylinder (imagine a giant pizza cutter) on which an all metal die — part of which is a unibody blade in the shape of the folder — is wrapped.
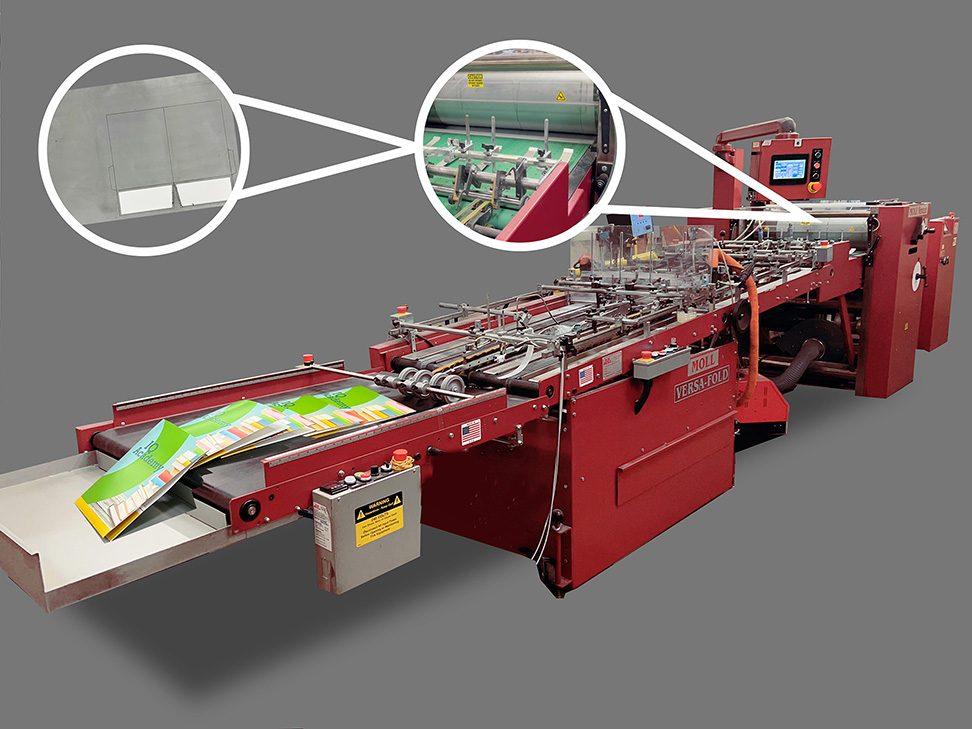
This is a state-of-the-art all-in-one machine: Rotary die-cutter, gluer, folder. Left inset shows die-sheet with embedded blade that is the shape of a folder.
Middle inset shows the rotary cutting mechanism on which the die-set is wrapped around; indicating where it located whithin the machine.
Next, adhesive is applied on the outer glue flaps. After which the flaps are folded inwards then up along with the pockets then affixed to the folder’s main panels. The final step is folding the open folder in half, as if closing a book.
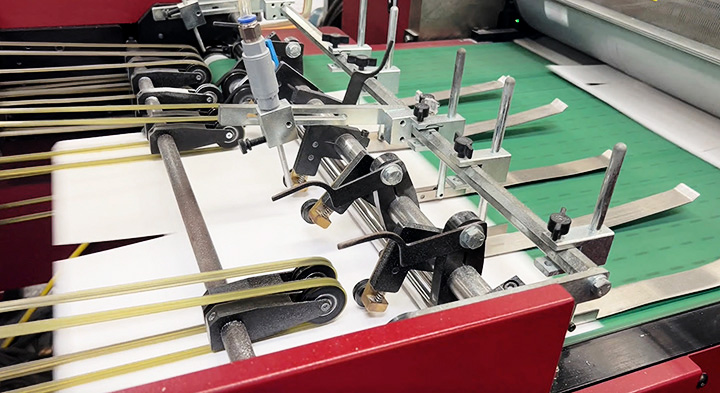
Here we see sheets of paper that have been cut to form after passing through the rotary cutter on the right.
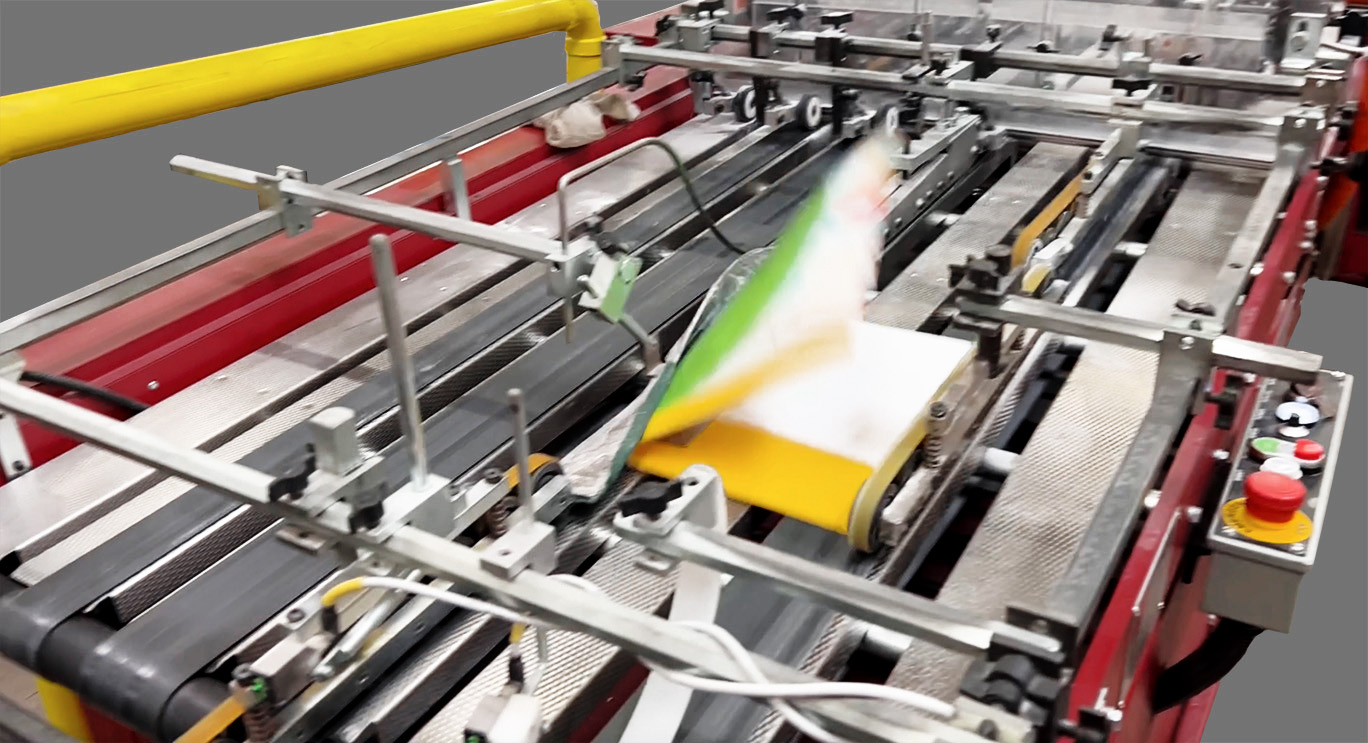
A glued and formed folder passing through the final station in the all-in-one-mchine and being folded into its final configuration.
Now that you know how a presentation pocket folder gets its shape, perhaps yo can get better sense and appreciation for this specialized printed product, and how — with the different methods, technologies, and complexities involved — it conveys a more personalized, custom touch when used for important presentations.